Report Items
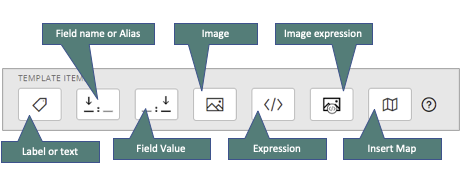
Infomaptic has many different report items to customize templates and determine how final reports will look. Many of these item share common editable attributes. For example, Label, Field Name, Field Value and Expression all have font properties that you can control. Here is a short overview of the items you can use, with more details below:
- Label or Text - Provides a space for static text to be placed in the template.
- Field Name or Alias - Lets you select from the list of fields available on the data source to show the name or alias for that field.
- Field Value - Lets you select from the list of fields available on the data source to show the value of that field.
- Image - Allows you to display an image hosted on a server, or embed an image inside the template.
- Expression - Lets you create a short Atelerix expression to change or format a field value.
- Image Expression - Uses an Atelerix expression to load an image from a server. You can use this to load images dynamically from attributes.
- Map - Allows you to embed an ArcGIS Web Map within the report.
- Attachments - Embeds ArcGIS Attachments associated with this layer in the report
- Related Tables - Allows you to embed a table in the template that pulls data from a related table or service.
Overview of Editing
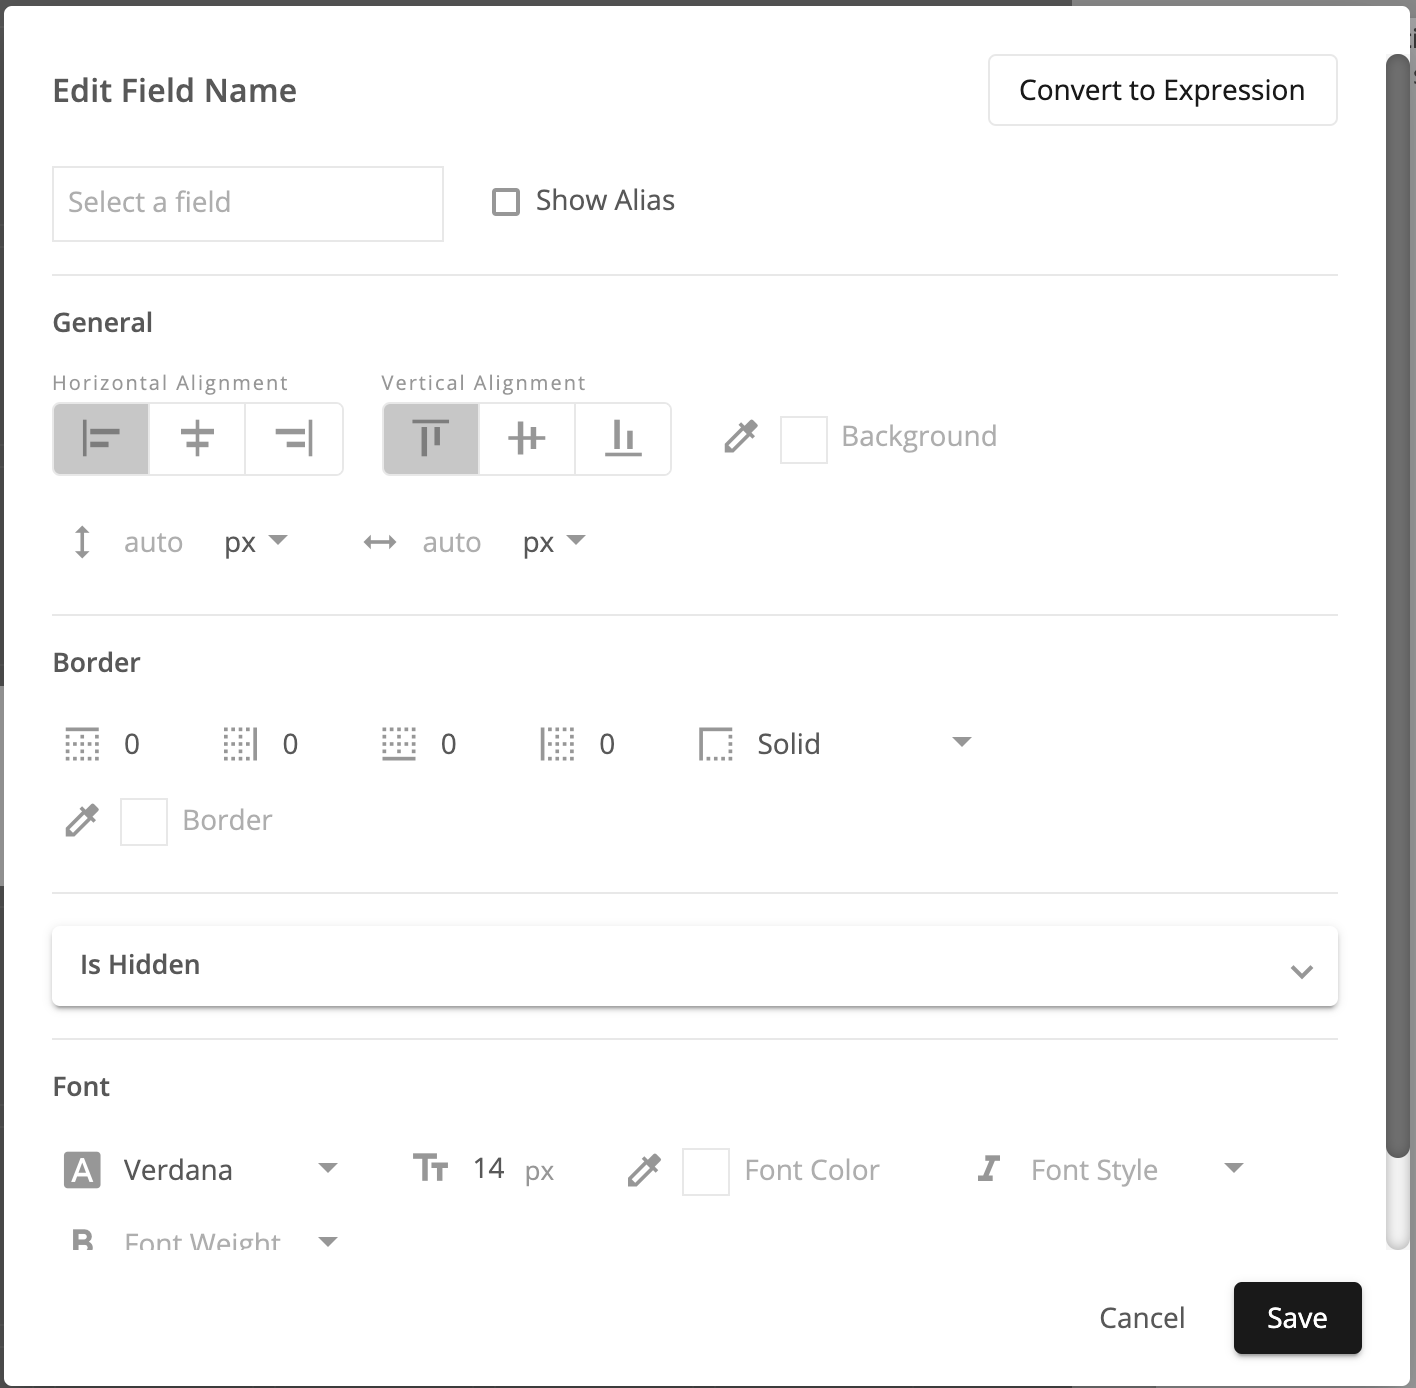
By dragging a new item onto the design surface or by clicking the edit button on an existing item, you are presented with the Edit dialog. The dialog below is for a Label item, but all edit dialogs look similar.
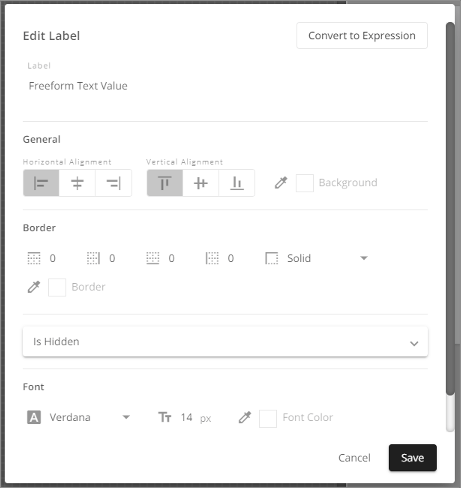
The top of the edit dialog contains the properties specific to the item. For example, a label item has a text box where you can enter a text value for display in the report.
Below that section follows Common Properties sections that allow you control various attributes of the item. These sections are:
- General - Allows control of general properties like background color and alignment.
- Border - Properties for controlling the border of an item
- Is Hidden - Allows you to set an Atelerix expression to optionally hide a control based on some condition.
- Font - Settings for the font if text is displayed.
You can save your changes by clicking Save at the bottom, or cancel them by pressing Cancel.

Copying an Item
You may copy an existing item in the designer by clicking on the copy button on the item. The item will be copied into the space below the original item with all the same properties, including size. The Edit dialog for the new item will open automatically.
Cancelling the edit dialog will remove the new item (the copy).
Common Properties
These settings are seen throughout various edit dialogs, and are used to control the same things across the application. If you see a Font section, you know that there is text to be displayed and you can control the font of that text.
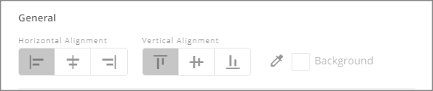
General
General properties allow you to control Horizontal and Vertical alignment, as well as the background color of the item. This is the alignment within the item, so the text or image would be centered or left justified within the space allocated for the item.
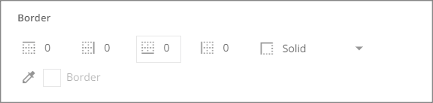
Border
Border provides control over the outside border of the item. This is drawn around the entire item, not only around the content of the item. You have control over each border’s size. You can also use Border properties to draw dividing lines within the template.
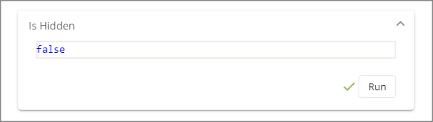
Is Hidden
Is Hidden provides a simple way to hide an item based on a condition. For example, you may want to hide a value if it is null or blank. Conditions are constructed by creating Atelerix statements that return a boolean, true or false value. The default value of IsHidden is false meaning that it will be displayed.
For example, if you had a field named comments and you wanted to hide that field if the value was null (you could also hide a different field), you could use an expression like this:
Text.IsNullOrEmpty(data.comments.value)
This returns True if the comments field is empty, meaning Hide the item. For more details about this function see: IsNullOrEmpty
Note: IsHIdden will hide the content of an item, but the item is still present in the display. While you can hide invalid dates for example, the space that the date would have taken up is still present in the layout This helps keep the layout consistent and predictable.
Note: that IsHidden is evaluated by the engine first. So other expressions within the item will not be evaluated. However in the case of Related Tables the data source will still be evaluated even if IsHidden is true so you may still write advanced expressions to check on the length of related data, for example.

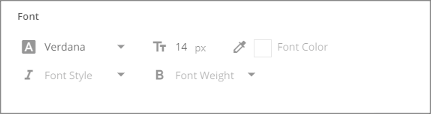
Font
Font properties apply to all text displayed within an item. Currently we don’t support changing font properties within a block of text, only to all of the text in the item. Font size, color, style and weight can all be set from these properties.
Label
A Label places static text in the report. This text does not change based on data so is good for titles, sections, descriptions, etc.
A label has a single text box for you to enter the text to be displayed. At any time, a Label can be converted to an Expression by clicking the Convert to Expression button in the upper right hand corner of the edit screen. This will not change your text in any way, but will allow you to use an Atelerix expression to manipulate the text, or to include data attributes.
In Addition to a text box to enter the text to display, Label uses the following common properties:
Field Name
A field name allows you to display the name or alias of a field in your data source. You can select the field to display from a dropdown, type in the dropdown to filter it if needed.
The Show Alias checkbox will convert to showing the field’s alias.
At any time, it can be converted to an Expression by clicking the Convert to Expression button in the upper right hand corner of the edit screen. This will not change your selected field in any way, but will allow you to use an Atelerix expression to manipulate the text, or to include data attributes.
In Addition Field Name uses the following common properties:
Field Value
A field value allows you to display the value of a field in your data source. You can select the field to display from a dropdown. Type in the dropdown to filter it if needed.
At any time it can be converted to an Expression by clicking the Convert to Expression button in the upper right hand corner of the edit screen. This will not change your selected field in any way, but will allow you to use an Atelerix expression to manipulate the text, or to include data attributes.
In Addition Field Value uses the following common properties:
Expression
An expression item allows you to construct an atelerix expression to display data instead of just selecting a field name, alias or value. You can use atelerix to do almost anything (it is a complete programming language) but it is commonly used for things like formatting strings, dates and numbers to display how you want.
Check out the commonly used section, for a quick start, or checkout the atelerix documentation.
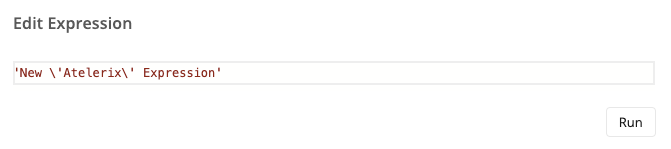
The editor contains a Run button to test your atelerix code. You will be given any errors, but also an example result. The atelerix expression should evaluate to a string. If it does not, it will be coerced into a string, so it’s best to make sure that it returns a string to get you preferred results.
In Addition Expression uses the following common properties:
Image
An image allows you to place an image within the report. Images are static and are defined while designing the template. If you want a dynamic image try Image Expression or if you are looking for displaying attachment images see Attachments.
You may enter the URL of an image or upload an image from your computer. Note that uploaded images are stored inside your template so large images may affect the performance of your report generation. To mitigate this, try hosting your image on a server and accessing it via URL. If you are hosting the image in your ArcGIS Portal see Secure Portal Image in the Image Expression item.
You may also control the size and rotation of an image. In Pixel mode, the size of the image is determined by the size of the box you have created in the designer.
When Maintain Aspect Ratio is enabled, the image will not be stretched to fill the space (in either mode). Instead it will be rendered as large as possible within the space given. If you want the image to be stretched to fill the exact space you have given it, disable Maintain Aspect Ratio.
An image item may also be converted to an Image Expression at any time by clicking the Convert to Expression button in the upper right had corner. This will not change the behavior of your image, but will allow you to use atelerix expressions to alter the properties.
You may also enter an image title and alt text that will be rendered into the html for you. In addition the following common properties are supported:
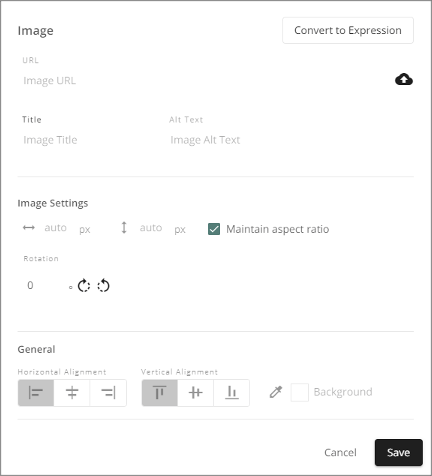
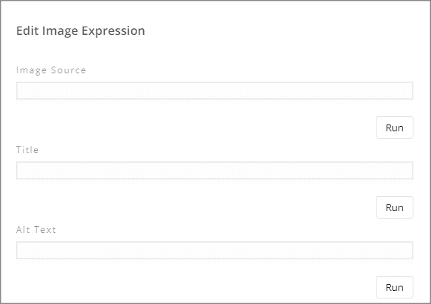
Image Expression
An Image Expression is just like an Image item except that you control the URL, Title and Alt Text with Atelerix Expressions. This is normally used when you want to dynamically construct the URL to an image, or if you need to access an image that is secured via ArcGIS Portal.
You may also set the height, width, rotation and aspect ratio settings of an Image Expression. They behave just as an Image does.
In addition the following common properties are supported:
Secure Portal Images
You can often use ArcGIS Portal to host your images, but you will need to handle the security yourself. One option is to share the image with “Everyone”. This means the image is public, but you can use it easily by simply referring to its data URL, which is usually something like: https://moraveclabsllc.maps.arcgis.com/content/items/${itemId}/data where the itemId is the GUID for the item.
In cases where you want that image to be secured, you need to include a token in the URL. You can do this by accessing the data.__token__.value atelerix object. For example, if the image URL was: https://moraveclabsllc.maps.arcgis.com/sharing/rest/content/items/ff38949c2aa64d00a2768c29a4de8026/data you could create the following atelerix expression:
'https://moraveclabsllc.maps.arcgis.com/sharing/rest/content/items/ff38949c2aa64d00a2768c29a4de8026/data?token='+data.__token__.value
This expression will attach the user’s current token onto the URL. If this will be shared with the public, you will want to consider sharing the image with the public as well to avoid images not showing up in your final report.
Note: If you want to have certain items only appear if the current user is logged in, you can use IsHidden to do that by checking to see if the token is null or empty:
Text.IsNullOrEmpty(data.__token__.value)
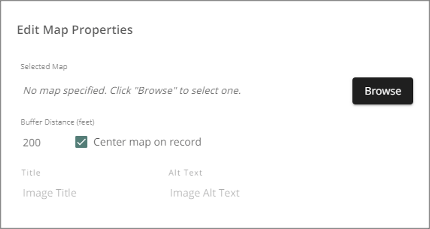
Map
A Map item allows you to embed an ArcGIS Online/Portal Map within the template. The map can be for reference, or can show the location of the specific record that the report is about.
Use the browse button to select the web map (don’t forget that you’ll have to share that webmap with the same people who you share the template with, or they won’t be able to see the map within the reports).
If the map is about a specific record, select Center map on record and provide a buffer distance. The current record geometry will be buffered when the report is generated, and the resulting polygon will control the extent of the map.
If the map is just for reference, leave Center map on record unchecked, and the map will remain at the default or home extent.
Since the maps are rendered as images, you have similar image properties to control, size (height and width) rotation, title and alt text.
Maps also allow a special hook called the Post Processing Expression. This expression allows you to write code that intercepts the WebMap JSON before it is sent to the ArcGIS Printer. This means that you can alter that JSON by turning layers on or off, adding or removing layers, etc. You are responsible for ensuring that the webmap JSON stays valid and correct.
This expression has access to a special property called data.__webmap__.value that contains the string representation of the webmap json before it is sent to the printer. You can change this string and then return it to make changes. Atelerix has built in functions to handle json. The goal is to convert the string into objects, alter those objects (like turning layers on or off) and then convert back to a string. This usually looks something like this:
// Extract the webmap JSON and convert it to an object to manipulate
var mapObj = json.FromString(data.__webmap__.value);
// Extract the list of layers
var layers = Dictionary.get(mapObj, 'operationalLayers', list());


// Construct a new list of layers by passing each layer through a function to transform it.
layers = List.map(layers, (i) => {
      var id = dictionary.get(i, 'title', 'NONE');
      // If the layer ID has "Hike" in it, we want to set the definitionExpression (where clause)
      if (Text.TestRegex(id, "Hike")) {
            // create a layerDefinition object
            var layerDef = Dictionary("definitionExpression", "FID = "+data.FID.value);
            // set the object
            return Dictionary.SetValueForKey(i, 'layerDefinition', layerDef);
      }
      return i;
});
// Set the layers back into the full object
var finalMap = return Dictionary.setvalueforkey(mapObj, 'operationalLayers', layers);
// Convert the object back into a JSON string (just like we got it)
return json.ToString(finalMap);
You also have access to all of the other data attributes you normally do, so you can easily use other fields to decide what layers to turn on/off, etc.
In addition the following common properties are supported:
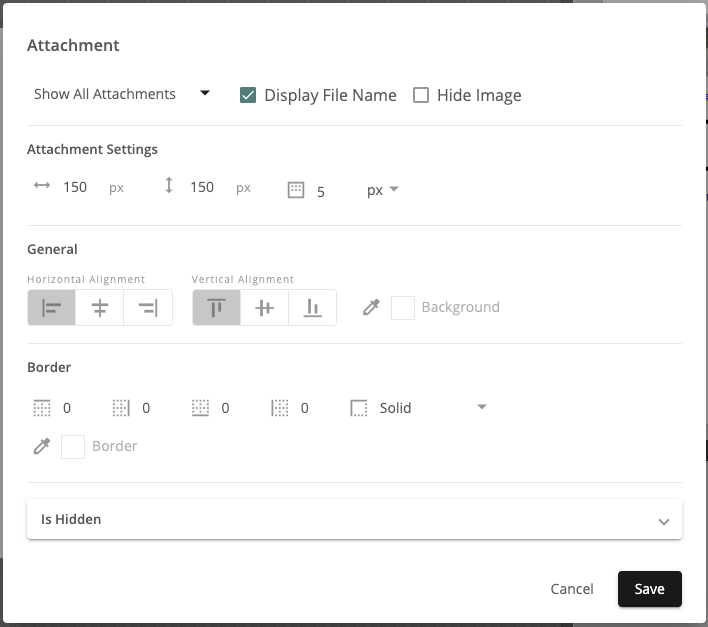
Attachments
Attachments allow you to include ArcGIS attachments that are available on your data source. Attachments don’t work if your service doesn’t support attachments, if you still need images, try Image or Image Expression.
Infomaptic supports images as attachments and will display them for you, but you can also display other types of attachments. Common file types will display a representative icon, others are displayed as a generic file icon.
![]()
You can choose to display All Attachments, Images Only, and Non Images Only. Note that you can include the Attachment item more than once, so you can easily include images in one part of your report, and non-images in another part.
The tool also allows you to optionally show the file name, which will appear as a hyperlink, allowing you to open or download the file. You can also choose to hide the image/icon. This is mostly used when you want to show a list of files that the user could download.
The most important part for attachments is setting an appropriate size and spacing. This is done via the Attachment Settings section. In both modes, you can set the size of the container for the image and its optional title. The image will always try to fill the full width of the space first, then the height. Images will not stretch to fill a space, they will maintain their aspect ratio automatically.
Spacing between attachments is controlled via the Margin control (shown after the width and height settings).
In addition the following common properties are supported:
Related Tables
Related tables allow you to display data from a related table in your report. Currently infomaptic can only display this data in tabular form. By default the item will let you select from related tables published in the same service as your data source. However you can override this using the ‘Advanced’ button. For layers that have a relationship class, we will automatically figure out how to connect the two layers and build a Where-Clause for you. However when connecting other layers you must create the where-clause for yourself.

After selecting a related table, the DataSource will be validated. After validation, that section of the form will minimize allowing more room for adjusting the fields that are visible in the table.
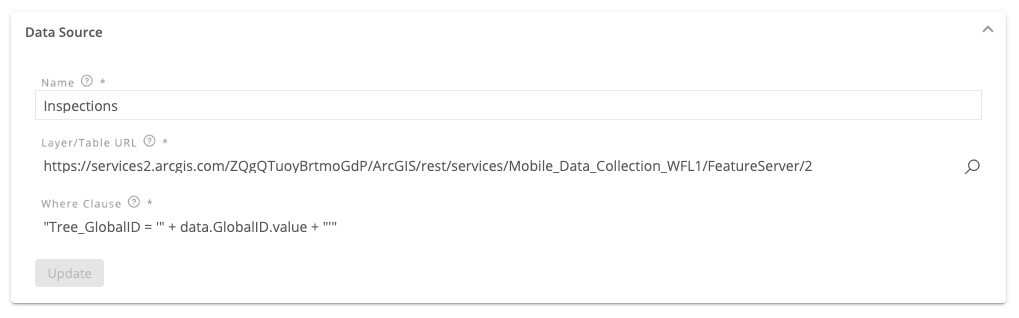
If you are using the advanced form you will need to set the following properties:
- Name - a unique name for the data source. This must be unique and cannot match an existing field in the data source, or the name of any other data source.
- URL - The URL to the service. You can browse ArcGIS Portal for data, or paste the URL here.
- Where-clause - The where-clause applied to the data. If you wanted all of the data you would use
"1=1"(note the quotes around it, it must be a valid atelerix expression).
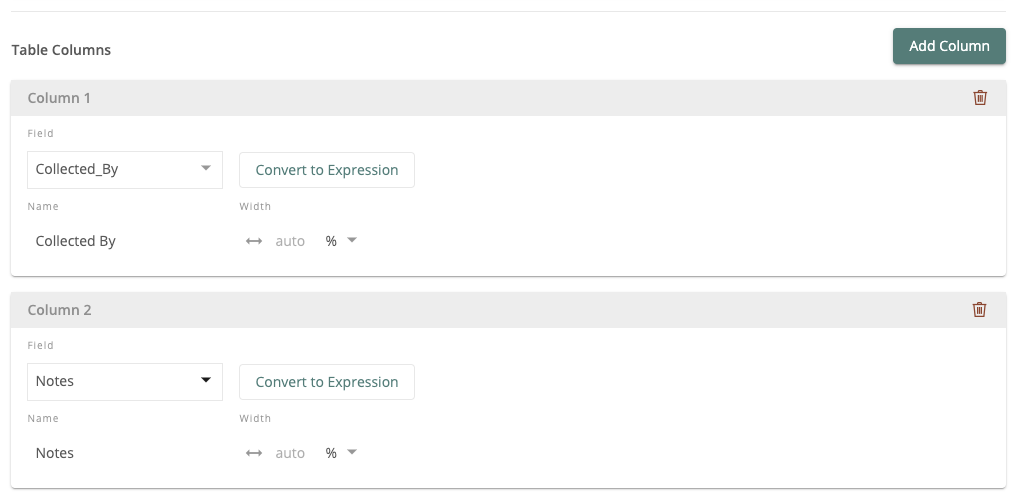
Once the data source for the table is configured, you can add as many fields as you like using the Table Columns section.
- To add a column click the Add Column button on the top right
- To remove a column, click the red trash can in the column that you wish to delete
- Select the field to display using the dropdown, the field name will be automatically populated with the field alias
- You can change the field names at anytime
- Setting the width of a column will cause it to take up that percentage of space that has been allocated to the table in the designer.
- Convert to Expression uses an Atelerix expression instead of just selecting a field name. You can use this if you need to format data, like displaying only dates instead of date times, for example.
Tables can also be constrained by the space you have given them in the designer, or they can automatically expand onto multiple pages as necessary. You control this via the “Allow Overflow” switch at the bottom. Any items above the table in the designer will be rendered in that position relative to the table. Any items below the table will be rendered on the next page regardless of how much space there is on the last page of the table overflow.
In addition the following common properties are supported:
Custom Where-clauses
Where-clauses for related tables are atelerix expressions that are evaluated within the context of the main data source and then passed along to the data source for the related table. The expression must evaluate to a string. You can always view and alter a where-clause for a related table that was done via selection by pressing the Advanced button.
For example,the main data source has a field called MarketName and the related table which contains data about the number of visitors to a specific farmers market on a given date contains a field called MarketVisited. Now you need to build a where-clause for the related table that will contain the current value of MarketName. So a desired where-clause might look like:
MarketVisited = 'PDX'
To obtain this result, we need to construct the where-clause as a string, where the variable in the where-clause represents the value of the MarketName field. The Atelerix expression should look like this:
"MarketVisited = '" + data.MarketName.value + "'"
Note that we’ve added single quotes around the value because atelerix currently does not support query parameters (That’s ok because Esri feature services won’t let us do bad things in the where-clause anyway, but still something we’ll add in the future).