The Report Designer
The designer allows you to quickly design templates by dragging and dropping items onto the design surface, configuring them and seeing a live preview as you build the report. You can also open a preview in a separate tab if you need to see what the full report will look like.
The report designer has several different sections to make it as easy as possible to design templates.
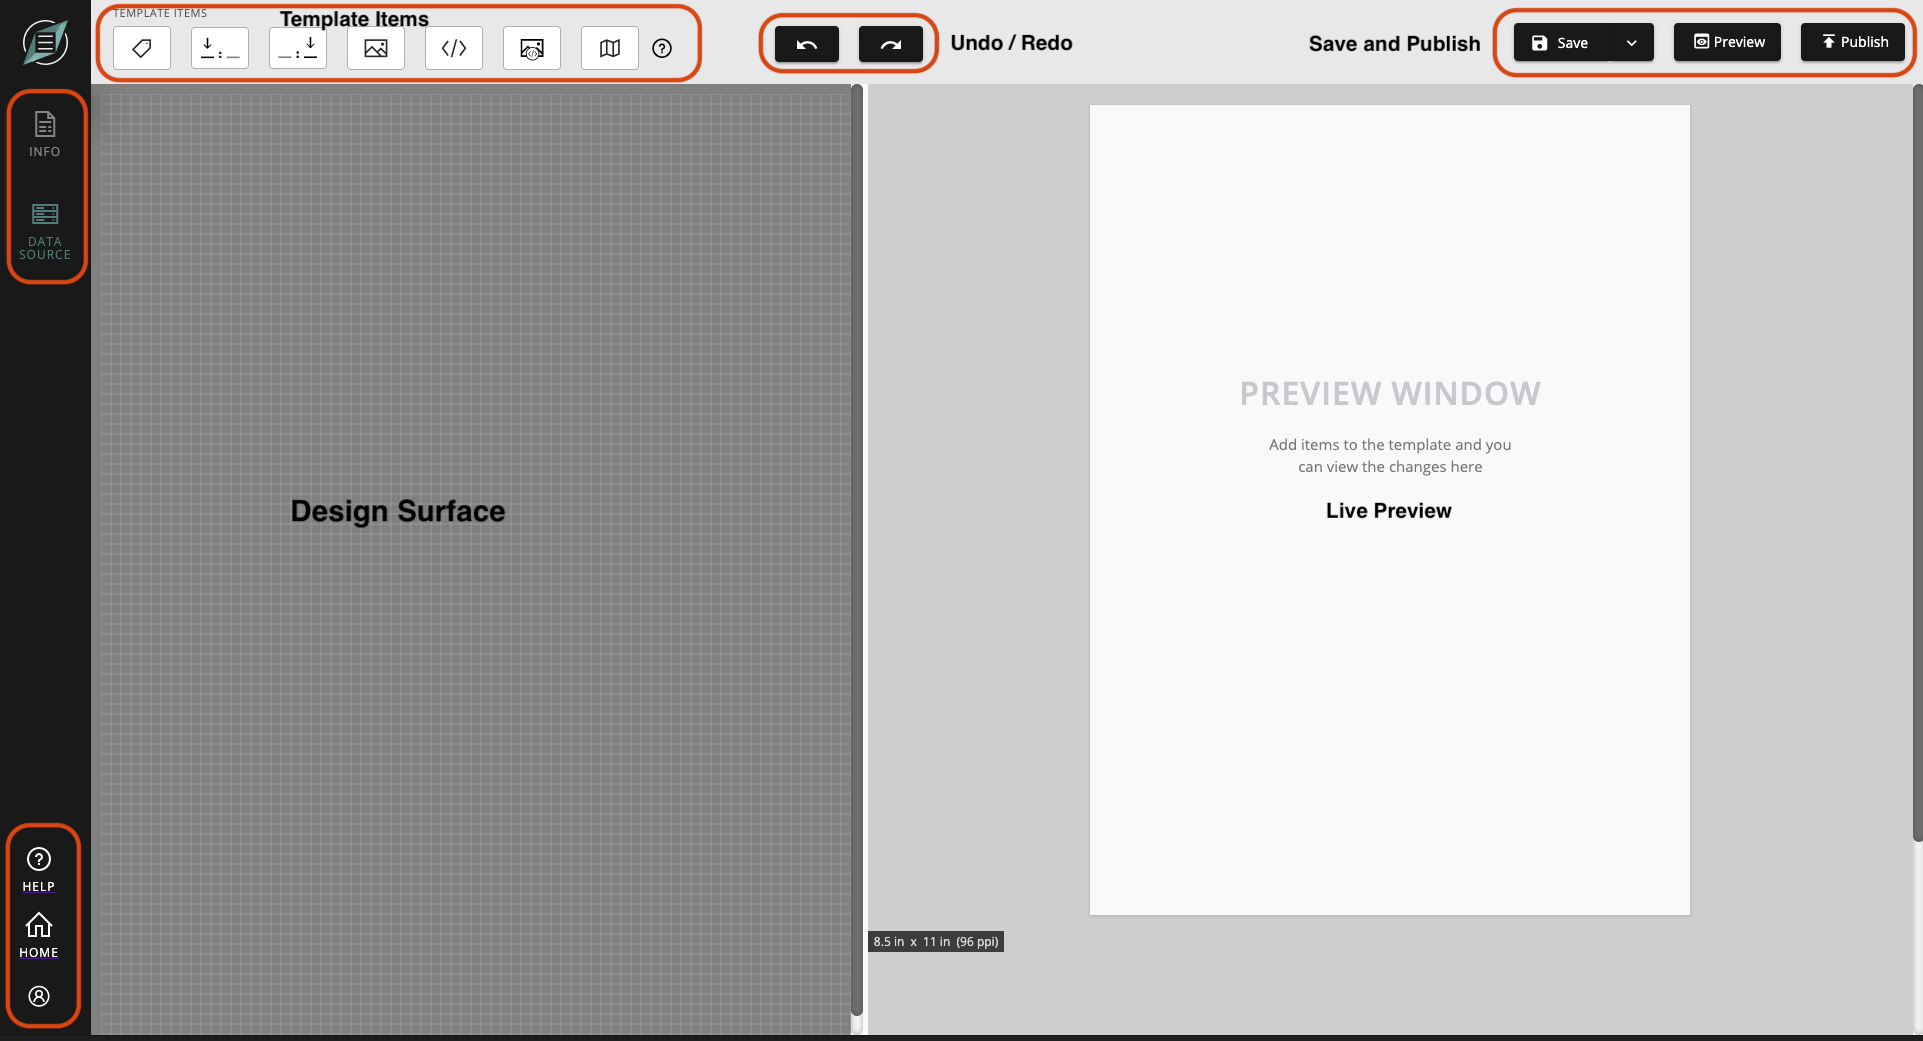
The designer is dominated by two sections, the Design Surface and the Live Preview. As you drag items from the Template Items Toolbar onto the Design Surface the Live Preview will automatically update to reflect those changes.
As you work, you can Save your template as often as you like. Infomaptic does not currently auto-save. Saving your work in a template does not make it visible in the viewer by other users. That only happens when you press Publish.
- Design Surface
- Live Preview
- Template Items
- Undo / Redo
- Save and Publish
- Return Home / Info / Data Source
- Help / Home
Designing Reports
To design a report, simply drag one of the template items onto the design surface. 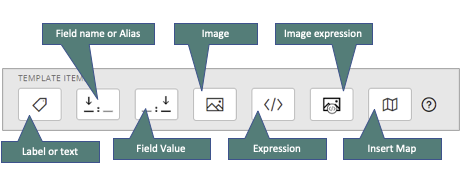
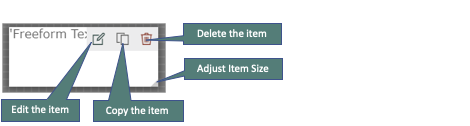
Once placed, you are presented with the settings for that item. For details about each of the items see Report Items. You may move, edit, duplicate, or delete any item within the design surface.
As you place and edit items on the design surface, the live preview will automatically refresh to show what the report will look like when published. You can also get a larger preview in a new tab by clicking on the Preview button in the Save and Publish section.
Return Home
Click the Infomaptic logo to return to the landing page. If you have unsaved changes and confirm that you want to leave the designer those changes will be lost.

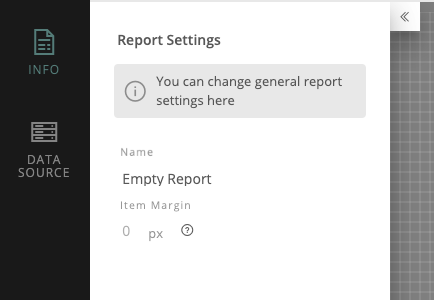
Template Settings
Click the Info button to open the Settings tab. This allows you to change the name of the template as well as the margin around items in the report.
Data Source
Templates are combined with a Data Source to make Reports. Each report takes the template and one record in the Data Source and plugs in the data. The Data Source is set in the Data Source tab.
Enter the URL for the feature class or table you want to use in the report. This URL should be specific to a single layer in a Map or Feature Service (that means it should include the layer number at the end). You can also browse for layers in our ArcGIS Organization by clicking on the magnifying glass next to the URL box.
The where-clause controls which feature is extracted when pulling a record from the Data Source. When loading a report, a special URL parameter called key is specified in the query string. This string is made available for the where-clause as data.value.key. Since the where-clause is an Atelerix expression, you can combine that key to make a valid SQL where-clause.
For example, a common default would be:
'OBJECTID = ' + data.key.value
So for a few different key values that could be specified in the URL:
| Key | where-clause |
|---|---|
| 1 | OBJECTID = 1 |
| 37 | OBJECTID = 1 |
| abc | OBJECTID = 'ABC' |
For information on how we prevent SQL Injection attacks here, see our blog: Oh no! SQL Injection!
The Default Example Key Value is the default value to use in the where-clause as data.key.Value. This value is used for the preview in the designer, as well as if no key value is specified in the URL.
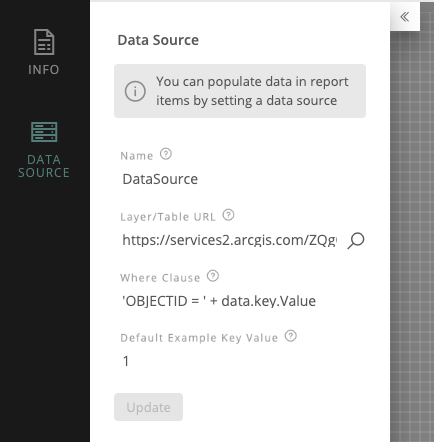
Changes made on this panel are not saved until you press the Update button. Remember, you still need to press “Save” on the upper right to persist any changes you make to a template (even changes to the Data Source).
Save and Publish
This section of the toolbar allows you to: Save, Save As (Makes a copy and opens it) Preview and Publish.
Save
Infomaptic templates are stored as Items in ArcGIS Online. The items are “Web Mapping Applications” with the tags “infomaptic” and “report template”. Each time you press save the template is saved to the item.
To make a copy of the template, you can press the drop-down arrow to the right of the “Save” button and click “Save-As.” This will create a new item with the same information and open it in the designer for you.
Publish
When you press Publish, a copy of the current configuration is made, and all view requests are handled by that copy. This allows you to edit and save the template while others are still using the previous version. When you are ready, pushing Publish will make your current version available to others.

The Publish Template dialog shows you how the URL for each report is created. You can test out different Key values, and see how the URL and where-clause change based on that key value.
You can also see the URL for use in the ArcGIS Web Map “Custom Attribute Display.” This URL can be copied and pasted directly to create a link that will open a report for each record in the popup.
NOTE: Technically, the copy of the current configuration is stored within the same ArcGIS Item. We just keep it separate so that you can work on changing a template while others are still using it!