Configure ArcGIS Enterprise with Infomaptic
Infomaptic supports using either ArcGIS.com or your own Enterprise as the Portal for data, storage and authentication. Infomaptic never stores any of your data or configuration. Your data remains in your Map and Feature services and all template configurations exist as items within your Portal (ArcGIS.com or Enterprise).
To login with your Enterprise account with Infomaptic you will need to:
- Create an OAuth2 Application in your Enterprise
- Create a custom Login Link to share with others
- (Optional) Add Infomaptic to your Enterprise App Launcher
Once you (or a user) has logged in to Infomaptic using Enterprise, the web application will remember this, and will direct you to login again to the same Enterprise the next time.
Adding Infomaptic to your Enterprise App Launcher makes it simple for your users to use Infomaptic.
To login to Infomaptic you will need your Portal URL and an Application Id.
Create an OAuth2 Application
You will create a new Application and register it in your portal to get an Application Id. That Id will be used to login to Infomaptic.
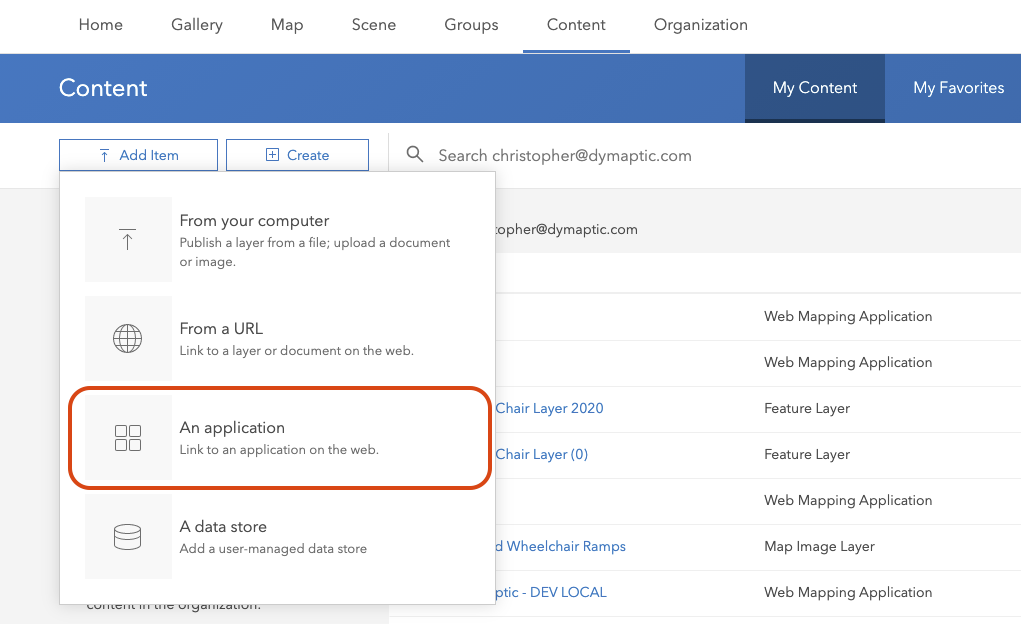
1.) Browse to your portal, under My Content click Add Item -> An Application
2.) On the “Add an Application” screen use the following settings:
- Type:
Web Mapping - Purpose:
Ready To Use - API:
JavaScript - Url:
https://app.infomaptic.com - Title:
Infomaptic - Tags:
infomaptic(you may add additional tags as you desire)
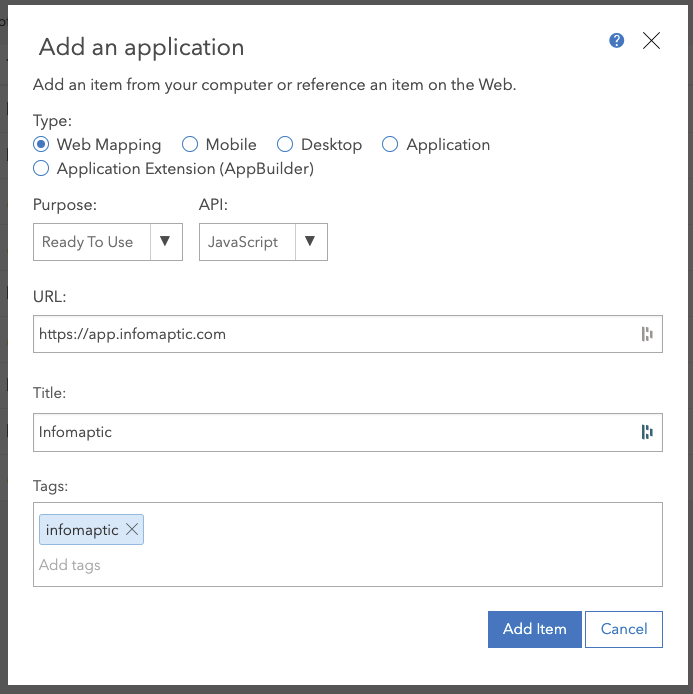
Click Add Item
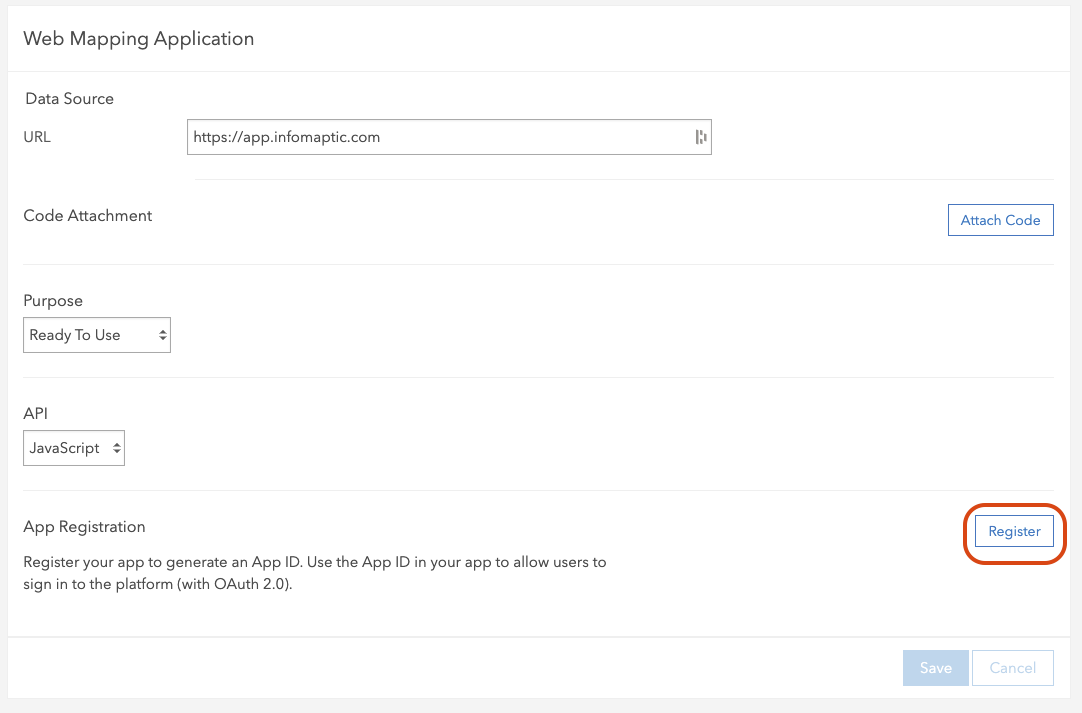
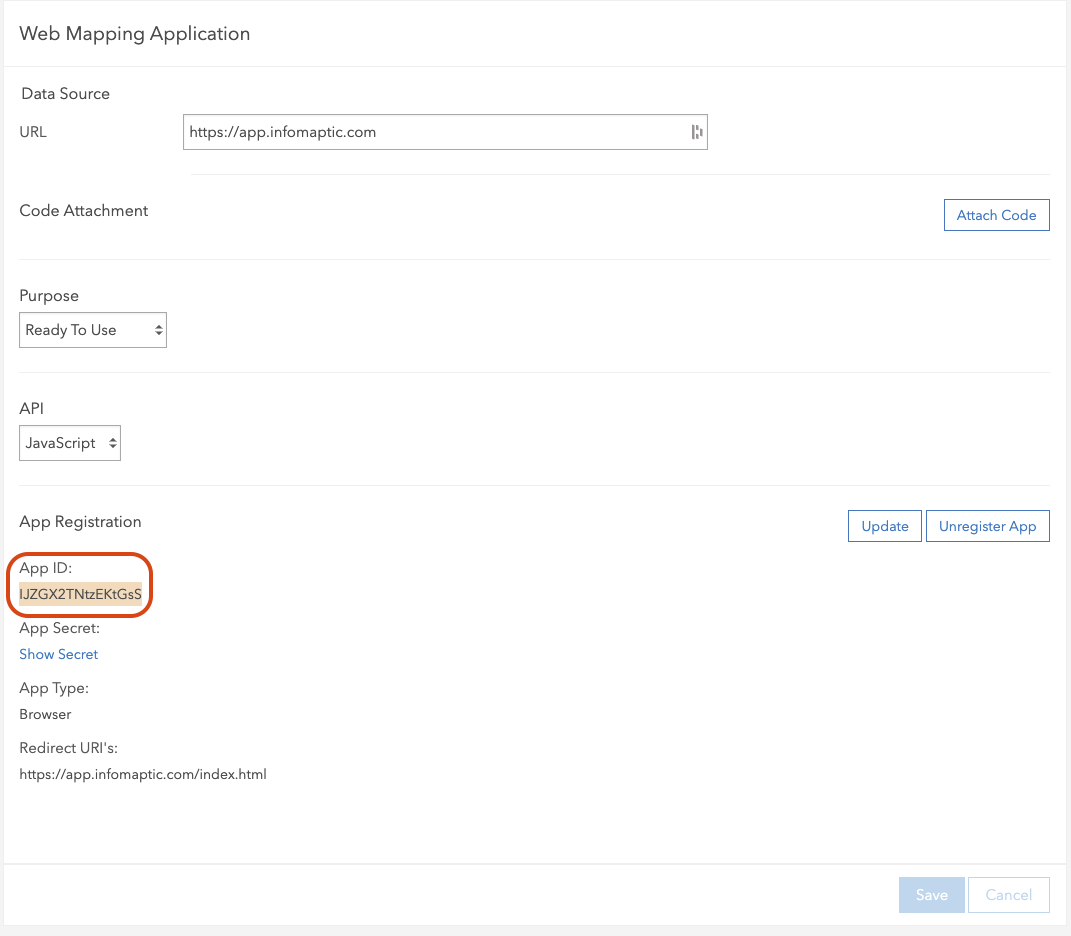
3.) Once the new item opens go to Settings -> Web Mapping Application and click on the Register button.
4.) In the “Register” dialog, enter the address https://app.infomaptic.com/index.html and Click Add then Register.
Note: It is important to include the /index.html on the end of the URL
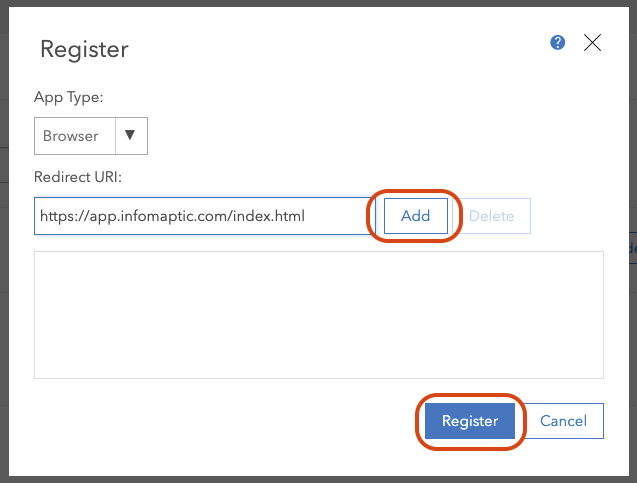
5.) Once registered, you will see the App Id property on the screen, copy this value to use to login to Infomaptic. This value is randomly generated and is unique, although not secret. You can safely share this value with others to allow them to login via Infomaptic.
You can now move on to creating a custom login URL for infomaptic.
Create a Custom Login Link
When Logging in to infomaptic, you are presented with the option to login via ArcGIS.com or via your Enterprise. In order to login via your Enterprise you must supply your Portal URL and the Application Id. To get around this requirement, you can construct a custom link that will bypass this screen and direct user to login via Enterprise.
1.) Goto: https://app.infomaptic.com/login and enter the Portal URL and Application Id.
Note: The Portal URL should not contain the /home component that you often see. Instead it should just point to the web-adaptor that is connected to portal. For example: https://arcgis.dymaptic.com/portal
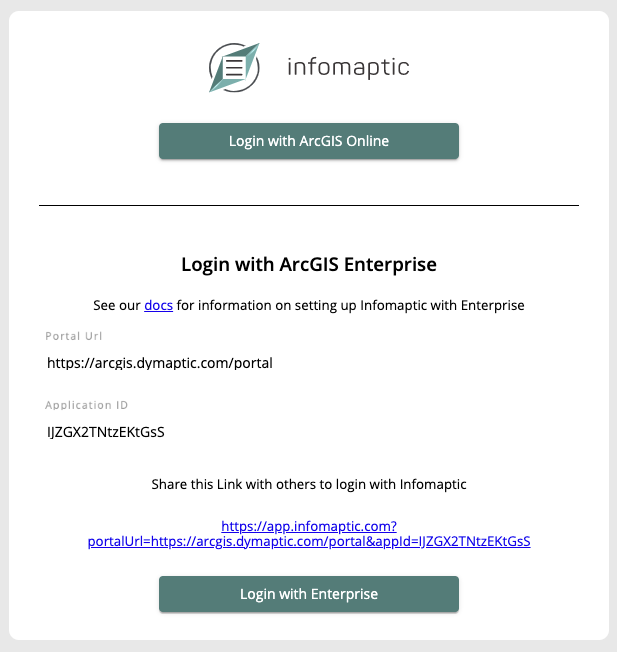
2.) The app will generate a URL that you can use to login to Infomaptic. Copy that URL, it should look something like this (but with your own portal and appId):
https://app.infomaptic.com/?portalUrl=https://arcgis.dymaptic.com/portal&appId=IJZGX2TNtzEKtGsS
Save this URL for the next section. You can login to Infomaptic by clicking the link or the Login with Enterprise button. Infomaptic will remember your portal settings once you have entered them.
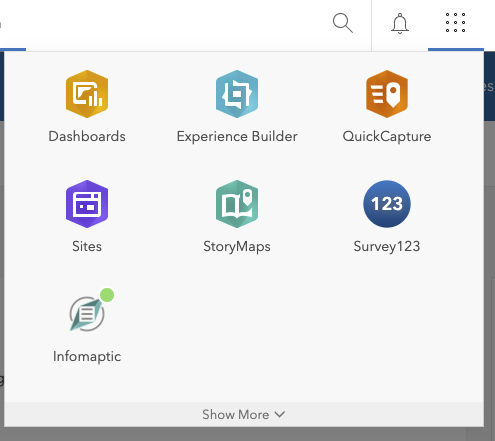
(Optional) Add Infomaptic to your Enterprise App Launcher
ArcGIS Enterprise (as well as ArcGIS Online) provides an App Launcher that lets users select from a set of applications to open quickly. This is accessible from the 3x3 grid of dots next to your name.
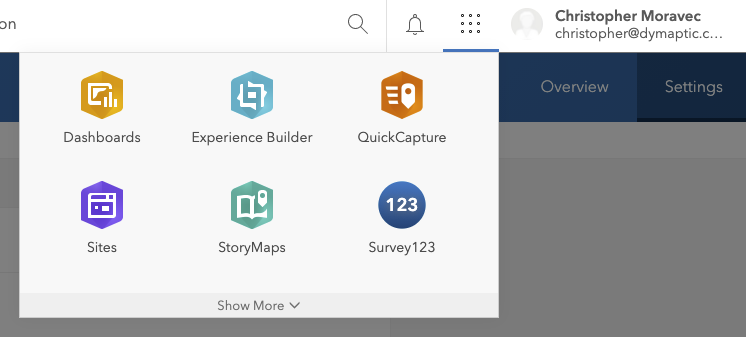
These instructions will show you how to add Infomaptic to that launcher. For more details about the launcher see the Esri Documentation.
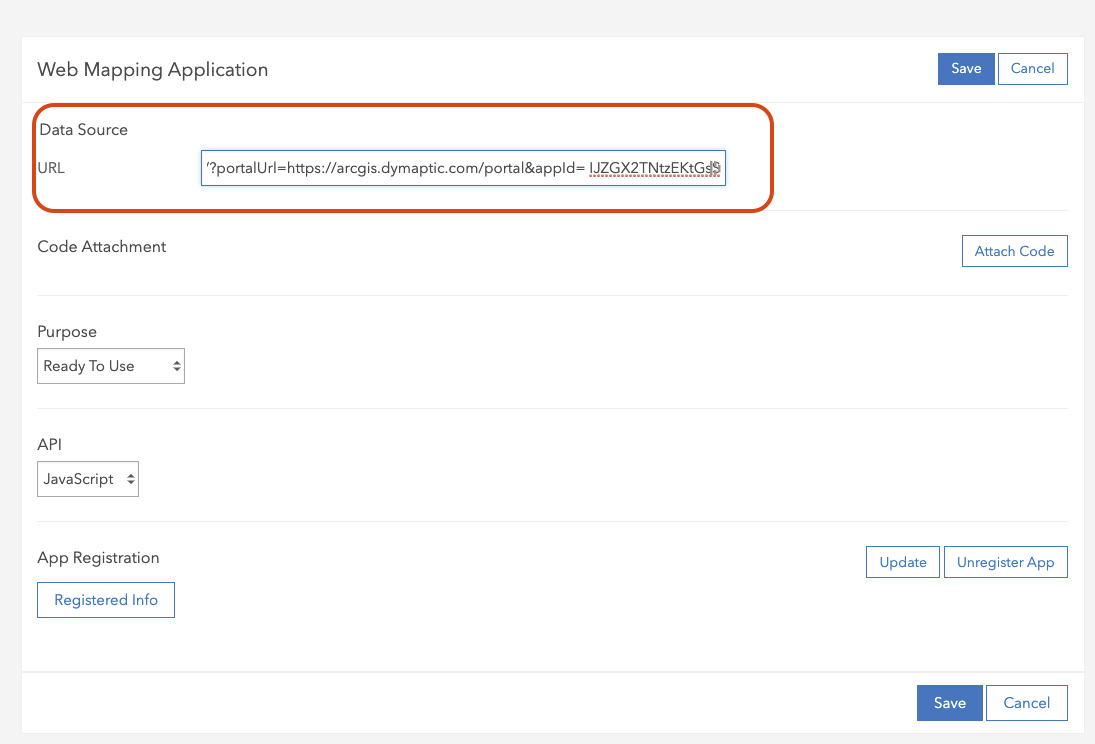
1.) From inside Enterprise, return to the Item that you created earlier to generate the AppId. Go to Settings -> Web Mapping Application and update the Data Source URL to match the URL from Creating a Custom Link.
In this example, the URL is: https://app.infomaptic.com/?portalUrl=https://arcgis.dymaptic.com/portal&appId=IJZGX2TNtzEKtGsS.
Click Save when you are done.
NOTE: Adding query parameters to this URL will sometimes cause Esri to hide the “App Registration” Section. If you ever need that section, simply reset the URL to be https://app.infomaptic.com/ this should trigger the App Registration section to re-appear.
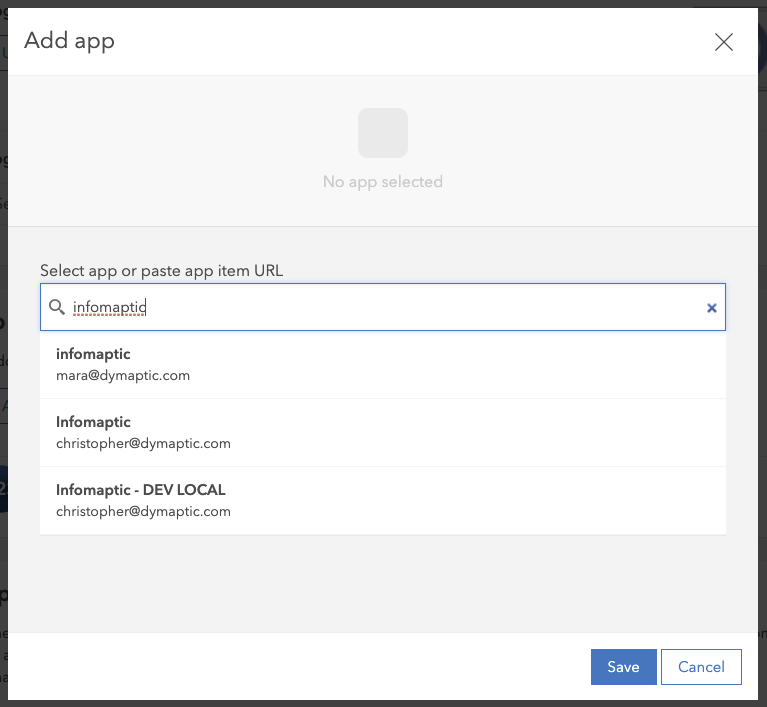
2.) Next, navigate to Organization -> Settings -> General -> App Launcher and click the Add button.

3.) Search for your app registration by entering “infomaptic” into the search box and click on the correct listing. You likely will only have one entry listed here, we have several for testing.
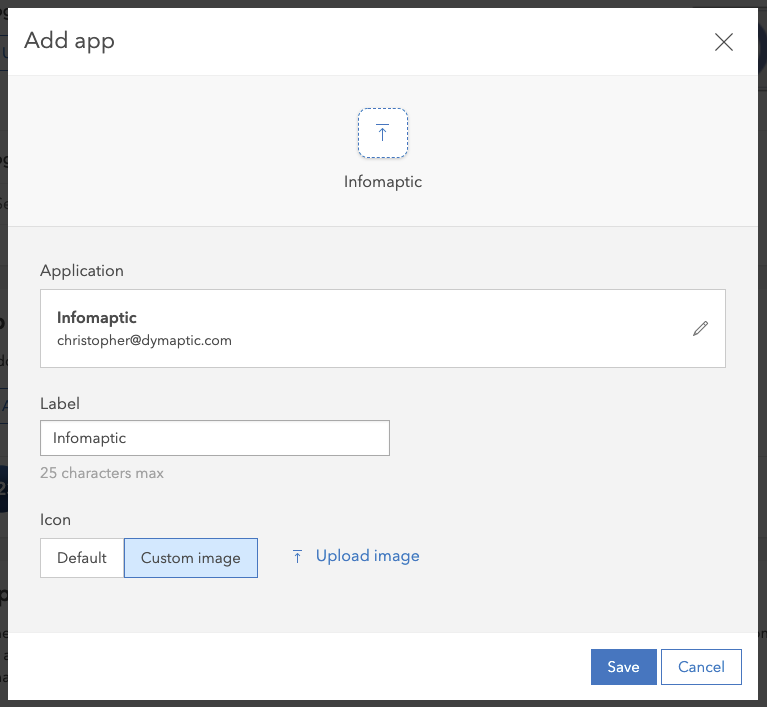
4.) Enter the following settings:
- Label:
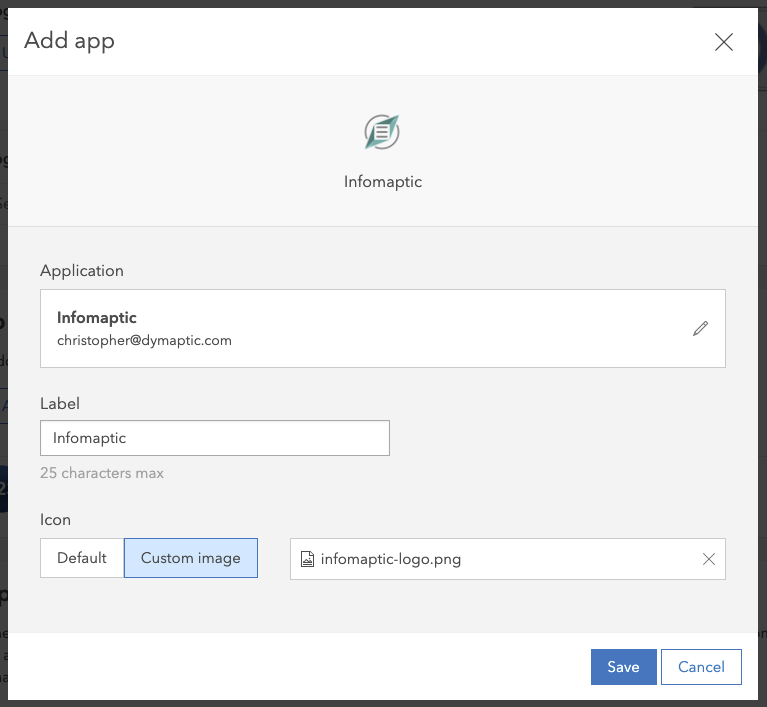
Infomaptic - Icon:
Custom Image
Click here to download the icon.
5.) When done, click Save
6.) Test that Infomaptic is available from the App Launcher